Nearly 70% to 80% of crib injuries involve side rail entrapment, a frightening reality for parents setting up nurseries. Crib side rails serve as essential barriers to prevent falls and keep infants safely contained during sleep, yet gaps, bumpers, and improper accessories can transform these protective features into serious hazards. Understanding proper rail spacing, identifying dangerous products, and choosing safe alternatives helps you create a secure sleep environment for your baby.
Table of Contents
- Introduction To Crib Side Rail Safety
- Crib Side Rail Safety Standards And Regulations
- Common Hazards And Injury Mechanisms
- Misconceptions And Safety Risks Of Crib Accessories
- Benefits And Safe Use Of Crib Rail Guards
- Implementing Crib Side Rail Safety In Your Nursery
- Summary And Next Steps For Parents
- Shop Safe Crib Rail Protection And Bedding Sets
Key takeaways
| Point | Details |
|---|---|
| Safe gap size | Rail slat spacing must not exceed 2 3/8 inches to prevent head entrapment and serious injury. |
| Bumper danger | Traditional crib bumpers increase suffocation risk and are banned in many states. |
| Rail guard benefits | Properly installed breathable rail guards cushion impacts and close unsafe gaps without suffocation risk. |
| Peak injury age | Most crib injuries occur when infants aged 6 to 12 months develop climbing and standing mobility. |
| Regular inspection | Monthly checks of rail integrity, gap spacing, and accessory condition prevent hazards as babies grow. |
Introduction to crib side rail safety
Crib side rails come in two primary designs: fixed rails permanently attached to the crib frame and adjustable rails that lower for easier infant access. These vertical barriers perform critical protective functions by preventing falls from the sleeping surface and keeping mobile infants contained throughout the night. A properly designed crib rail system creates a secure enclosure where babies can sleep safely without parents worrying about nighttime tumbles.
Parents face several common safety concerns when evaluating crib side rails:
- Side rail gaps: Spaces between slats that exceed safety limits create entrapment hazards where infant heads or limbs can become stuck
- Entrapment zones: Gaps between the mattress and rail, or between rail components, where babies can become wedged
- Fall risks: Insufficient rail height or damaged rails that allow mobile infants to climb over barriers
- Hard edges: Unpadded wooden or metal rails that can cause injury when infants bump against them during sleep movements
Understanding these fundamental risks helps you evaluate your current crib setup and identify areas requiring immediate attention or improvement.
Crib side rail safety standards and regulations
The Consumer Product Safety Commission established strict requirements to minimize crib injuries. CPSC mandates rail slat gaps no wider than 2 3/8 inches to prevent head entrapment, the leading cause of crib-related injuries and deaths. This precise measurement ensures infant heads cannot slip between slats while keeping limbs from becoming dangerously wedged.
Traditional padded crib bumpers face increasing regulatory restrictions due to documented suffocation risks. Multiple states including Maryland, New York, and Ohio have banned their sale entirely, recognizing that soft bedding items in cribs contribute to preventable infant deaths. The American Academy of Pediatrics recommends bare sleep surfaces without bumpers, pillows, or loose bedding.
Safety certifications like ASTM International F1169 provide third-party verification that cribs meet rigorous structural and spacing requirements. Look for certification labels on cribs and accessories to ensure compliance with current federal standards.
| Regulation Type | Requirement | Enforcement Agency |
|---|---|---|
| Federal slat spacing | Maximum 2 3/8 inches between rails | CPSC |
| State bumper bans | Prohibit sale of traditional bumpers | State consumer protection |
| ASTM certification | Structural integrity and safety testing | Third-party certification |
| Mattress support | Must not collapse under 200 lbs force | CPSC |
For guidance on selecting compliant cribs, review recommendations on crib adjustable side rail safety before making purchasing decisions. Research from the NIH on crib entrapment provides detailed analysis of injury patterns and prevention strategies.
Common hazards and injury mechanisms
Entrapment represents the most serious crib rail hazard. When slat gaps exceed the 2 3/8 inch limit, infant heads can slip through while shoulders remain trapped, creating potentially fatal compression injuries. Entrapment accounts for 70% to 80% of crib-related injuries involving side rails, making proper gap spacing the single most important safety factor.
Damaged or deteriorating rails introduce additional risks:
- Splintered wood: Creates sharp edges that can scratch or puncture delicate infant skin
- Loose slats: Allow gaps to widen beyond safe limits or create unstable surfaces
- Cracked joints: Compromise structural integrity and may collapse under infant weight
- Peeling paint: Exposes babies to potential lead or chemical ingestion if rails were painted before current safety standards
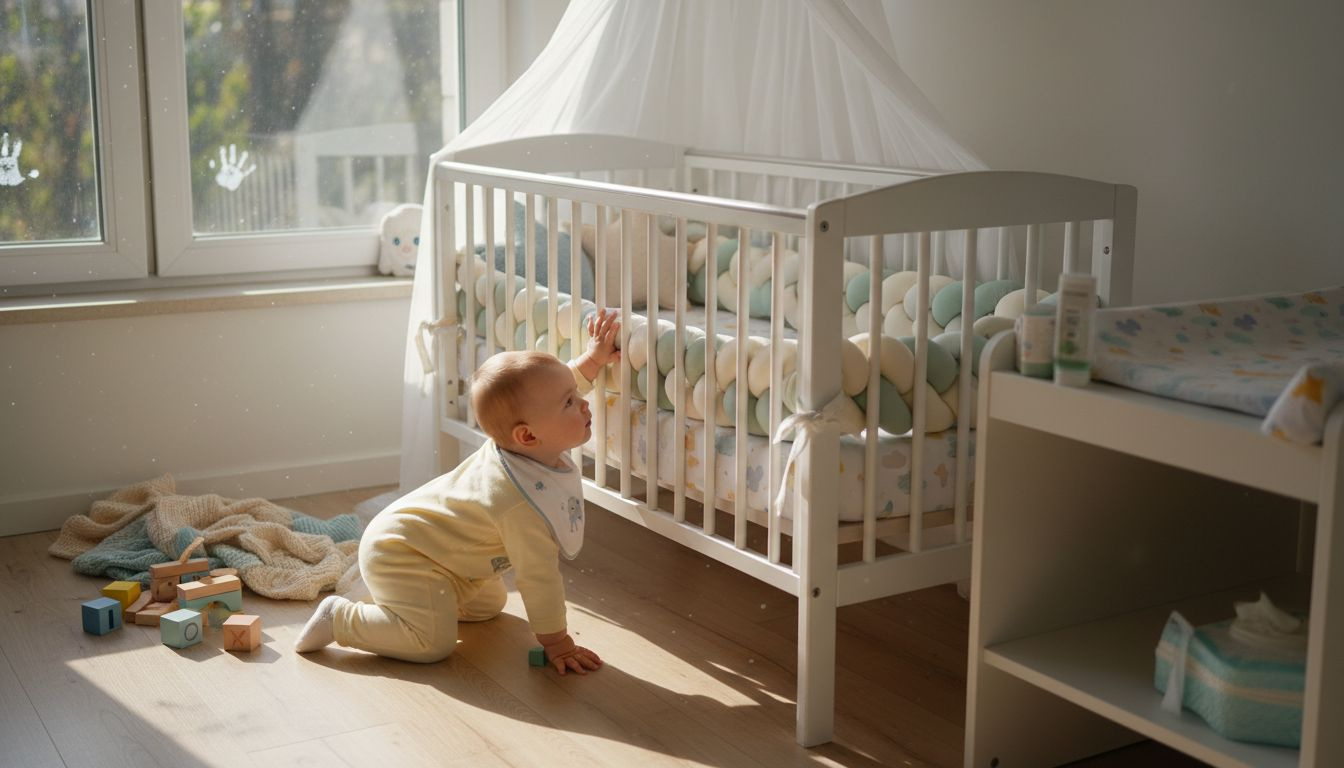
Mobility development dramatically increases fall risks. Over 60% of falls and injuries occur in infants aged 6 to 12 months, the developmental window when babies learn to pull themselves up and attempt climbing. A six-month-old who could not reach the rail top last week may suddenly develop the strength to hoist themselves over the barrier.
Pro Tip: Measure your crib rail gaps monthly with a toilet paper roll. If the roll (standard 1.6 inch diameter) passes through easily but a soda can (2.6 inches) does not, your spacing is safe. This simple test takes 30 seconds and provides peace of mind.
Explore common setup errors and prevention strategies through resources on crib setup mistakes to avoid. Additional statistical analysis appears in AHRQ crib injury data and NIH entrapment studies.
Misconceptions and safety risks of crib accessories
Parents often confuse crib bumpers with rail guards, two products with vastly different safety profiles. Traditional bumpers are thick, padded fabric panels that tie to crib rails and cover all four sides, creating a soft barrier that completely encloses the sleep space. Rail guards are thin, breathable covers that wrap only the top rail edge, leaving slat spacing visible and air circulation unrestricted.
The distinction matters because bumpers contribute to approximately 5% of accidental infant suffocation deaths in cribs. Babies can press their faces into the soft padding, restricting airflow and causing asphyxiation. The same cushioning parents intend for protection becomes a deadly hazard when infants roll against it during sleep.
Rail guards offer specific benefits when manufactured to safety standards. They cushion the hard top rail where teething babies chew and mobile infants bump their heads while standing. Quality guards use mesh or thin breathable fabrics that cannot create suffocation pockets, and they attach securely without creating entrapment gaps.
| Feature | Traditional Bumpers | Approved Rail Guards |
|---|---|---|
| Coverage area | All four sides, full height | Top rail edge only |
| Material thickness | 1-3 inches padded fabric | Under 0.5 inch thin mesh |
| Suffocation risk | High, banned in many states | Minimal with breathable materials |
| Air circulation | Blocked around perimeter | Unrestricted through slats |
| Primary purpose | Prevent limb entrapment (ineffective) | Cushion teething and bumps |
For detailed comparison of safe alternatives, consult guides on when to use crib bumpers safely and the history of bumper safety laws. The AAP’s infant sleep guidelines provide comprehensive recommendations for safe sleep environments.
Benefits and safe use of crib rail guards
Properly designed rail guards address two specific safety concerns without introducing new hazards. They cushion impacts when infants pull themselves up and bang their heads against the hard rail edge, reducing bruising and discomfort. Guards also cover small gaps between the mattress support and rail where tiny fingers or toes might otherwise become pinched.
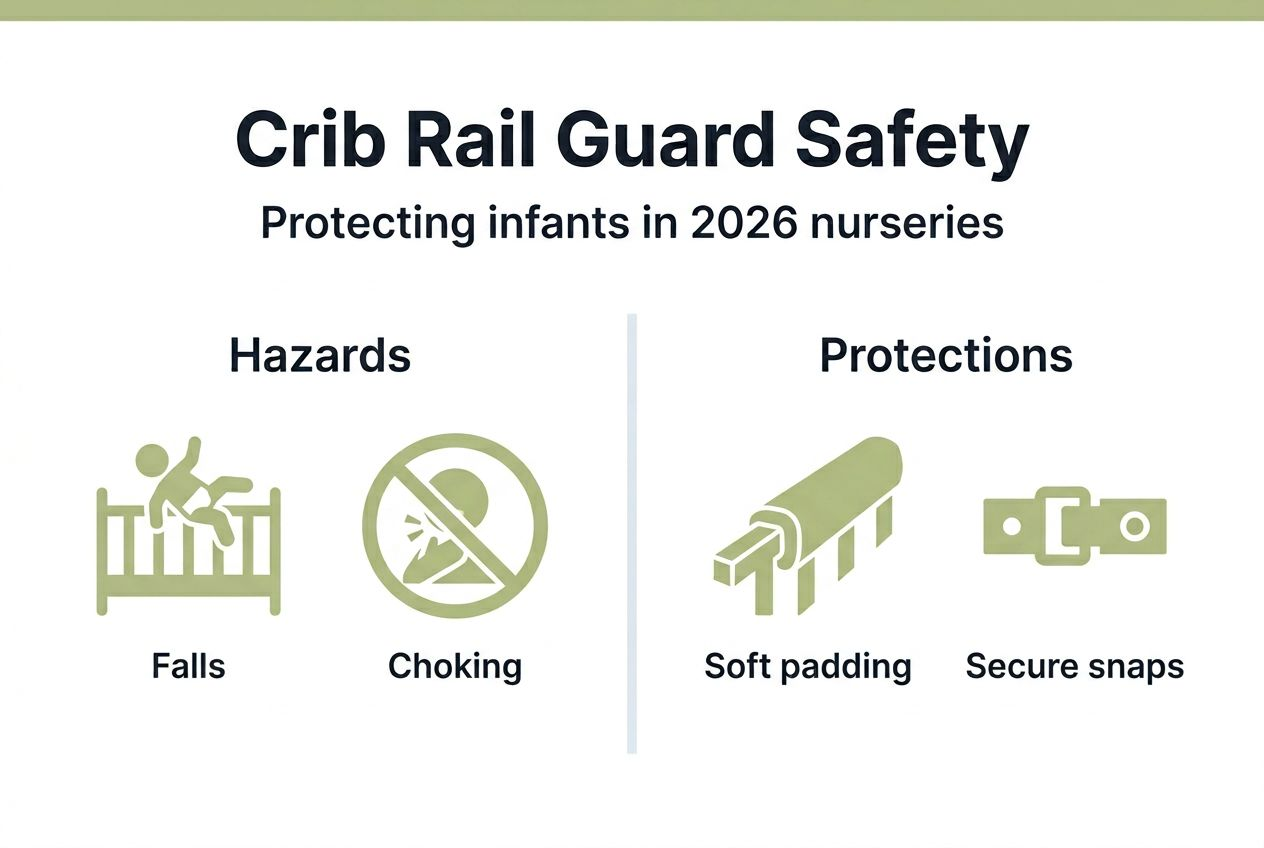
Approved rail guards reduce minor injuries by 30% in homes and daycares when installed correctly. This protection comes from strategic placement on only the top rail, leaving side slat spacing open for visibility and air circulation. Choose guards made from hypoallergenic cotton, bamboo, or polyester mesh that allows unrestricted breathing even if an infant presses against it.
Follow these installation steps to maximize safety:
- Measure the rail: Confirm the guard length matches your crib’s top rail dimensions with minimal excess fabric
- Check tie placement: Ensure attachment ties are positioned on the outer rail side, never where infant hands can reach
- Test security: Pull firmly on the installed guard to verify it cannot slip or create gaps where babies might become wedged
- Inspect regularly: Examine ties weekly for fraying and retighten any that have loosened during use
- Remove when climbing starts: Take guards off immediately when your baby begins attempting to climb out, as the fabric provides grip
Maintenance requires monthly washing in fragrance-free detergent to remove drool and bacteria buildup. Inspect stitching and ties for wear each time you launder guards, replacing any showing signs of deterioration.
Pro Tip: Select rail guards with snap closures instead of long ribbon ties. Snaps eliminate loose ends that could pose strangulation risks and they stay secure better than ties that babies can gradually loosen through repeated pulling.
Explore installation techniques through crib rail protection guides and safety specifications in rail cover guides. Technical evaluation data appears in ASTM rail guard standards.
Implementing crib side rail safety in your nursery
Begin with a comprehensive safety assessment using this inspection checklist:
- Measure every gap: Use a rigid ruler to verify all slat spacing stays under 2 3/8 inches along the entire rail length
- Test rail stability: Shake each rail section firmly to identify loose connections or weakened joints
- Examine surfaces: Run your hand along all rail edges checking for splinters, cracks, or peeling finish
- Check mattress fit: Ensure no gap wider than two adult fingers exists between the mattress edge and crib rails
- Inspect hardware: Tighten any loose screws and replace missing or damaged bolts immediately
Remove all traditional bumpers from your crib, even if they were expensive gifts or match your nursery decor perfectly. The suffocation risk outweighs any perceived benefit. Replace them with breathable mesh rail guards designed specifically for top rail protection.
Balancing safety with aesthetics requires selecting accessories that meet both criteria. Modern rail guards come in colors and patterns that coordinate with bedding while maintaining thin, breathable construction. Personalized options let you add your baby’s name without compromising safety standards.
Pro Tip: Schedule crib safety inspections on the first day of each month, syncing them with your calendar app. As your baby grows and develops new motor skills, weekly checks become necessary once they start pulling up or attempting to climb.
Maintaining a safe environment extends beyond the crib itself. Use non-toxic cleaning products when wiping down rails to avoid exposing your baby to harsh chemicals. Explore safe bumper alternatives, personalized crib accessories, and additional setup mistake prevention.
Summary and next steps for parents
Crib side rail safety requires ongoing attention as your infant develops new abilities. The protective barriers that keep a newborn secure need reassessment when that same baby reaches six months and starts pulling up on the rails. Regular maintenance prevents small issues from becoming serious hazards.
Prioritize these essential actions:
- Verify CPSC compliance: Confirm your crib meets current federal standards for slat spacing and structural integrity
- Remove traditional bumpers: Take out any padded bumper products regardless of marketing claims about breathability
- Install approved guards: Add thin, breathable rail guards to cushion the top rail without blocking airflow
- Maintain inspection schedule: Check rail gaps, hardware tightness, and guard condition monthly at minimum
- Adapt to development: Increase inspection frequency and remove climbing aids when your baby shows new mobility skills
Access detailed safety information through adjustable rail guidelines and bumper alternative recommendations. Remember that prevention requires vigilance but the effort protects your most precious investment.
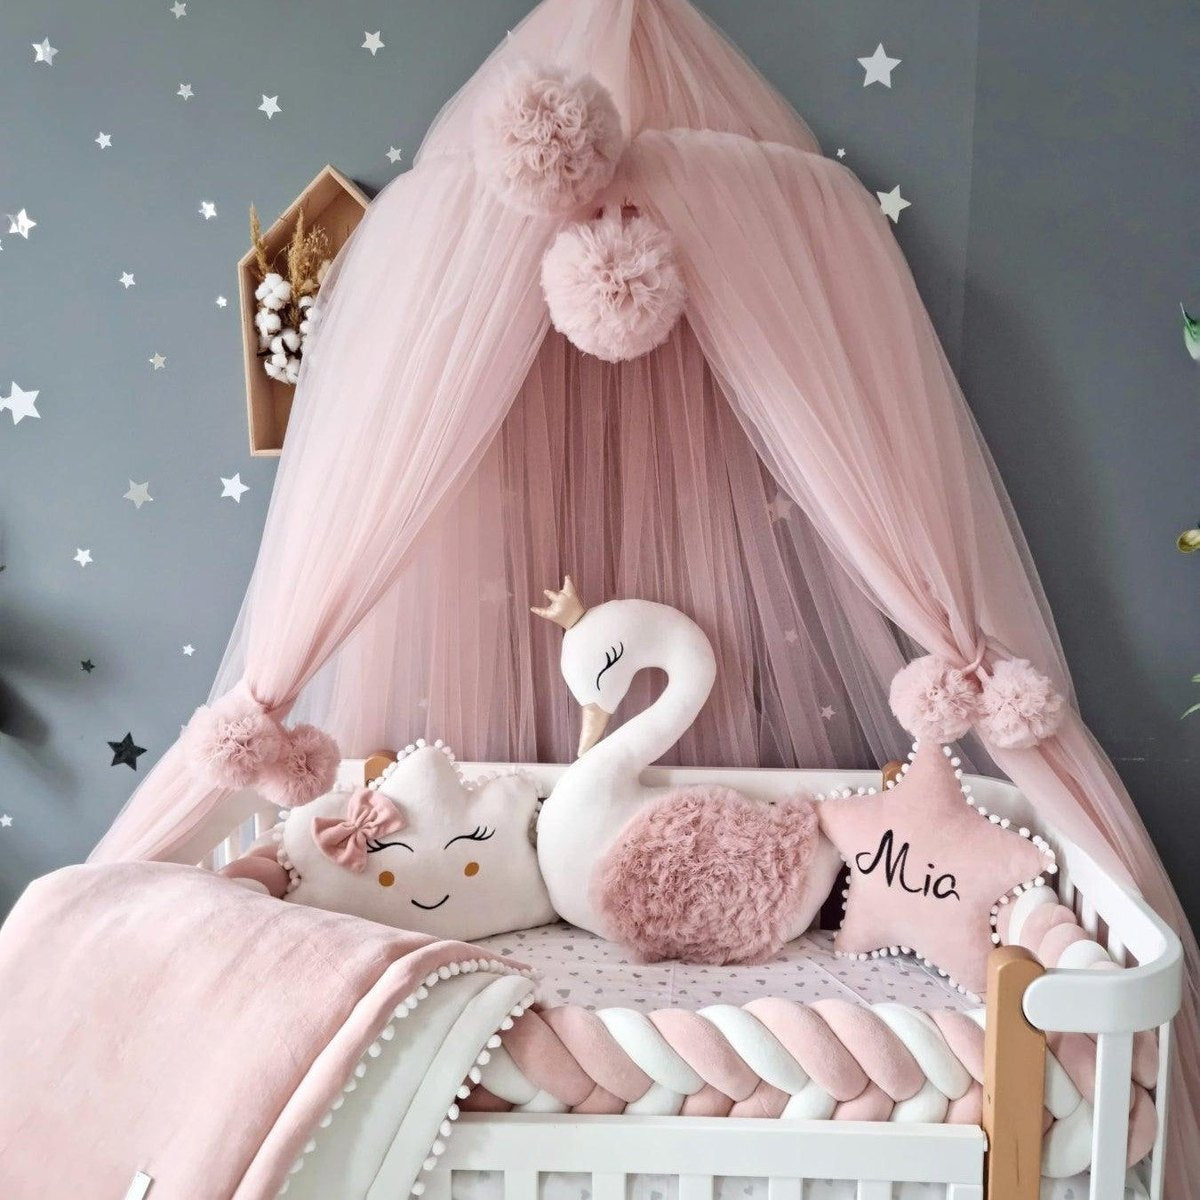
Shop safe crib rail protection and bedding sets
Now that you understand crib rail safety essentials, explore products designed with these principles in mind. Our hypoallergenic rail covers provide cushioning protection while maintaining breathable mesh construction that meets safety standards. Each baby bedding set coordinates with rail guards to create a cohesive, secure nursery aesthetic.
The gray braided rail cover offers neutral styling that complements any decor while protecting tender gums during teething phases. Browse current baby bedding sets on sale to find coordinating options that combine safety, comfort, and personalization in handmade designs created specifically for parents prioritizing infant wellbeing.
FAQ
Are crib bumpers safe to use with infant side rails?
No, traditional padded crib bumpers are not safe. Bumpers contribute to approximately 5% of accidental infant suffocation deaths in cribs by creating soft surfaces against which babies can press their faces and restrict breathing. Many states have banned their sale entirely. Instead, use breathable mesh rail guards that cover only the top rail edge and cannot create suffocation pockets. Explore safer options through guides on when bumpers can be used.
How can I check if my crib side rails meet safety standards?
Measure the gap between each pair of slats using a rigid ruler to confirm spacing stays under 2 3/8 inches throughout the entire rail. Inspect all rails for cracks, splinters, loose connections, or peeling paint that could create hazards. Shake the rail firmly to test structural stability. Re-check measurements every month as hardware can loosen over time and infant weight puts increasing stress on joints. Find detailed inspection protocols in crib setup mistake prevention guides.
When should I replace crib rail guards or inspect them?
Inspect rail guards weekly for loose fabric, fraying ties, or separation from the rail. Wash guards monthly and examine stitching carefully while handling the clean, damp fabric. Replace guards immediately if you notice any tears, weakened attachment points, or fabric deterioration. Remove guards entirely once your infant begins attempting to climb out of the crib, typically between 8 and 15 months, as the fabric provides grip for climbing. Consult rail protection guides for maintenance schedules.