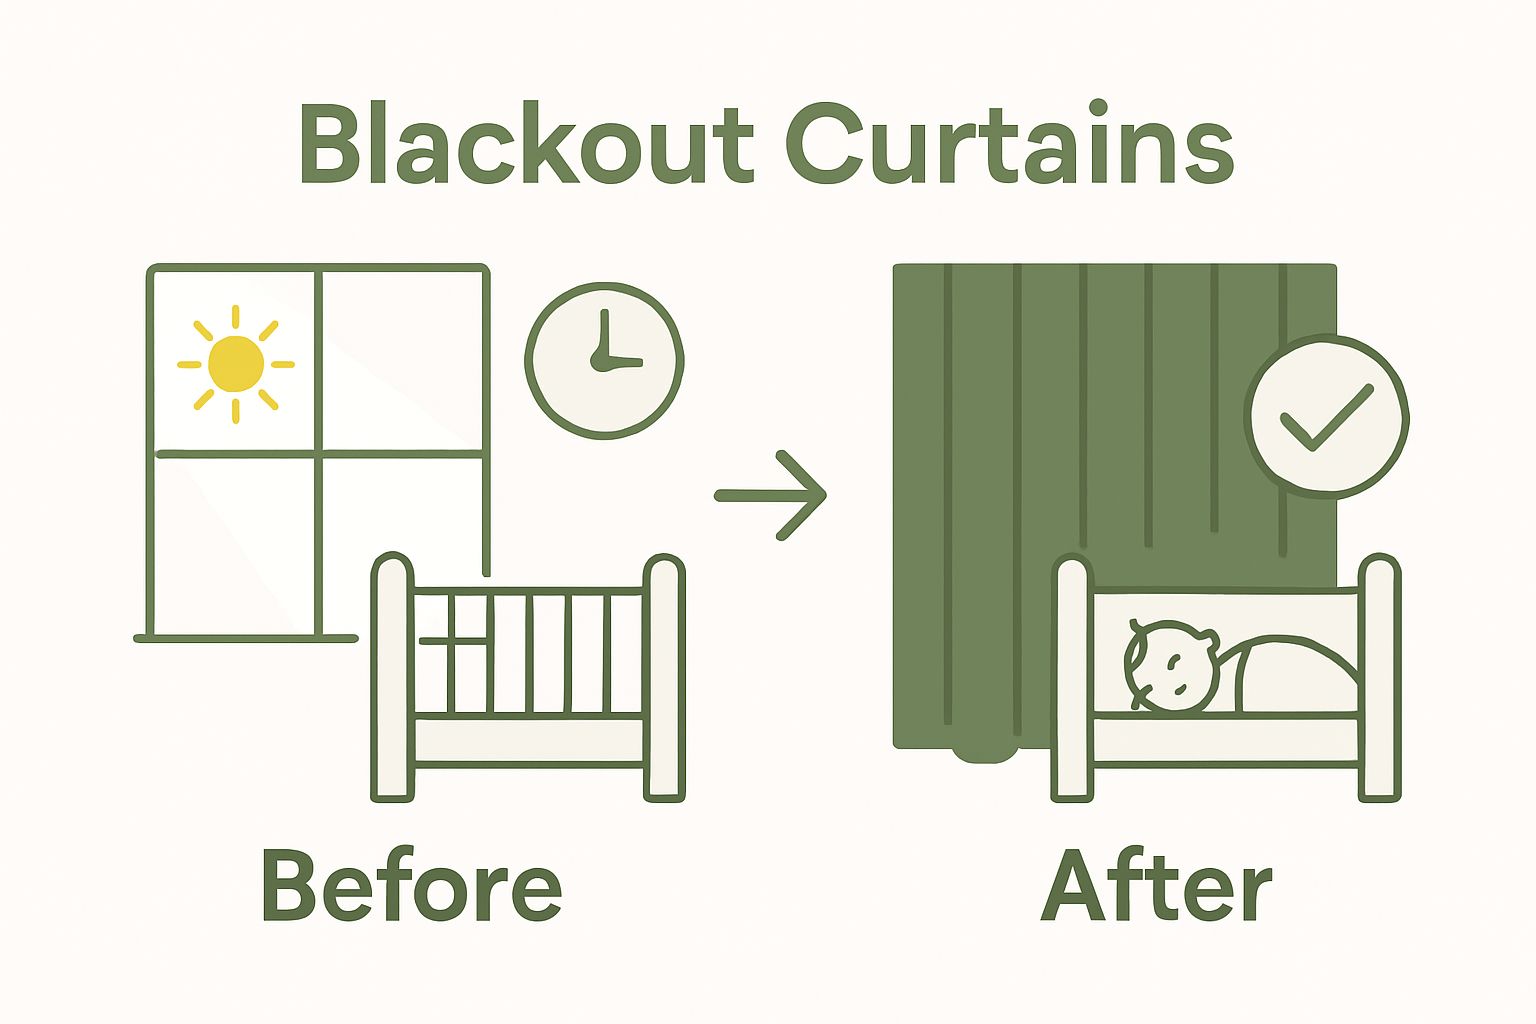
Eltern fragen sich oft, wie sie ihren Babys erholsame Nächte und lange Nickerchen ermöglichen können. Studien zeigen jedoch, dass natürliches Licht den Schlafrhythmus eines Säuglings stärker beeinflusst als fast jeder andere Faktor im Kinderzimmer . Die meisten hängen einfach dicke Vorhänge auf und hoffen auf das Beste. Erstaunlicherweise können ein paar sorgfältig ausgewählte und angebrachte Verdunkelungsvorhänge den Schlaf Ihres Babys grundlegend verändern – und unruhige Nächte der Vergangenheit angehören lassen.
Inhaltsverzeichnis
- Schritt 1: Beurteilen Sie die Lichtverhältnisse in Ihrem Kinderzimmer.
- Schritt 2: Stoff- und Stilpräferenzen festlegen
- Schritt 3: Messen Sie Ihre Fenster genau aus
- Schritt 4: Wählen Sie die passende Gardinenstange und das richtige Aufhängesystem.
- Schritt 5: Vorhänge anbringen und auf Wirksamkeit testen
Kurzzusammenfassung
| Kernaussage | Erläuterung |
|---|---|
| 1. Die Lichtverhältnisse in der Kindertagesstätte gründlich beurteilen | Verstehen Sie, wie natürliches Licht ins Kinderzimmer gelangt, um die richtigen Vorhänge auszuwählen und die Schlafqualität Ihres Babys zu verbessern. |
| 2. Wählen Sie schwere, dichte Stoffe für die Vorhänge. | Durch die Verwendung schwerer Materialien wird eine effektive Lichtblockierung und Temperaturregulierung für ein angenehmes Raumklima gewährleistet. |
| 3. Messen Sie die Fenster genau aus, um die Passform sicherzustellen. | Präzise Fenstermessungen verhindern Lichtspalten und gewährleisten einen optimalen Sitz der Vorhänge für beste Leistung. |
| 4. Wählen Sie stabile Gardinenstangen und -halterungen. | Stabile Beschläge halten schwere Verdunkelungsvorhänge und verbessern die Gesamteffektivität beim Abdunkeln. |
| 5. Ergebnisse der Vorhanginstallation testen und überwachen | Beobachten Sie nach der Installation die Schlafmuster Ihres Babys, um die Wirksamkeit der Verdunkelungsvorhänge zu beurteilen. |
Schritt 1: Beurteilen Sie die Lichtverhältnisse in Ihrem Kinderzimmer.
Die Wahl der richtigen Verdunkelungsvorhänge fürs Kinderzimmer beginnt mit einem genauen Verständnis der Lichtverhältnisse im jeweiligen Raum. Bevor Sie sich für einen Fensterdekorationsartikel entscheiden, sollten Sie eine gründliche Lichtanalyse durchführen, die Ihnen bei der Auswahl der Vorhänge hilft.
Beginnen Sie damit, die Ausrichtung der Fenster im Kinderzimmer und den natürlichen Lichteinfall im Tagesverlauf zu untersuchen. Fenster nach Süden und Westen erhalten in der Regel intensiveres Sonnenlicht, was das Risiko von Hitze- und Helligkeitsstörungen während des Mittagsschlafs und des Nachtschlafs erhöht. Gehen Sie zu verschiedenen Tageszeiten durch das Zimmer und beobachten Sie, wie das Sonnenlicht einfällt. Natürliches Licht kann die Schlafqualität eines Säuglings erheblich beeinflussen , daher ist es wichtig, diese Muster zu verstehen.
Messen Sie Ihre Fenster genau aus und notieren Sie neben Breite und Höhe auch die Tiefe der Fensterrahmen sowie mögliche Hindernisse wie Heizkörper, Möbel oder architektonische Elemente, die die Gardinenmontage beeinträchtigen könnten. Präzise Messungen vermeiden späteren Ärger und gewährleisten eine perfekte Passform. Verwenden Sie ein Metallmaßband für genaue Messungen und notieren Sie die Maße sowohl in Zoll als auch in Zentimetern, um beim Kauf flexibel zu sein.
Berücksichtigen Sie neben den Fenstern auch andere Lichtquellen im Zimmer. Deckenleuchten, Nachtlichter, Flurbeleuchtung und elektronische Geräte können die Umgebungshelligkeit erhöhen und den Schlaf Ihres Babys stören. In unserem Ratgeber zur Gestaltung der idealen Kinderzimmerbeleuchtung erfahren Sie, wie verschiedene Lichtquellen zusammenwirken und den Schlafrhythmus Ihres Babys beeinflussen.
Fotografieren Sie die Fenster Ihres Kinderzimmers morgens, mittags und abends, um eine detaillierte Lichtkarte zu erstellen. Diese visuellen Referenzen helfen Ihnen, Ihre spezifischen Bedürfnisse bei der Auswahl von Verdunkelungsvorhängen zu kommunizieren und dokumentieren die individuellen Lichtverhältnisse Ihres Zimmers. Achten Sie besonders darauf, wie viel Licht zu den Hauptschlafzeiten von Säuglingen einfällt, typischerweise zwischen 10 und 14 Uhr sowie nach 19 Uhr.
Durch eine sorgfältige Analyse der Lichtverhältnisse im Kinderzimmer schaffen Sie eine strategische Grundlage für die Auswahl von Verdunkelungsvorhängen, die die Schlafumgebung Ihres Babys optimieren. Je genauer Ihre erste Einschätzung ist, desto gezielter und effektiver wird Ihre Vorhangauswahl sein.
Schritt 2: Stoff- und Stilpräferenzen festlegen
Die Wahl des richtigen Stoffes und Stils für Verdunkelungsvorhänge im Kinderzimmer erfordert mehr als nur ästhetische Überlegungen. Ihre Entscheidung beeinflusst direkt die Lichtundurchlässigkeit, die Raumtemperaturregulierung und den Komfort Ihres Babys. Informieren Sie sich zunächst über die besonderen Eigenschaften verschiedener Vorhangmaterialien und wie diese zu einer optimalen Schlafumgebung beitragen.
Stoffgewicht und -dichte sind entscheidend für die Lichtundurchlässigkeit. Schwere Stoffe wie dickes Polyester, Samt und speziell entwickelte Verdunkelungsmaterialien bieten eine deutlich bessere Lichtundurchlässigkeit als leichtere Textilien. Achten Sie auf Vorhänge mit mehreren Stofflagen oder integriertem Verdunkelungsfutter, die maximale Dunkelheit garantieren. Synthetische Materialien bieten oft eine bessere Lichtundurchlässigkeit und sind in der Regel günstiger und pflegeleichter als Alternativen aus Naturfasern.
Berücksichtigen Sie bei der Auswahl der Vorhänge die Gesamtästhetik des Zimmers. Moderne Kinderzimmer profitieren von schlichten, minimalistischen Vorhängen in neutralen Farben, die eine ruhige Atmosphäre schaffen. In traditionellen Räumen passen hingegen aufwendigere Vorhänge mit dezenten Mustern oder strukturierten Stoffen besser. Entdecken Sie unsere sorgfältig zusammengestellte Sammlung an Einrichtungsideen für Kinderzimmer und erfahren Sie, wie die Vorhänge das Gesamtbild des Zimmers ergänzen.
Neben der Optik spielt die Textur eine wichtige Rolle. Weiche, glatte Stoffe schaffen eine beruhigende Atmosphäre und reduzieren Hautirritationen bei empfindlicher Babyhaut. Mikrofaser- und Polyestergemische bieten eine hervorragende Kombination aus Weichheit, Strapazierfähigkeit und Lichtundurchlässigkeit. Vermeiden Sie raue oder kratzige Materialien, die Unbehagen oder sensorische Überreizung verursachen könnten.
Praktische Überlegungen sollten Ihre Auswahl leiten. Maschinenwaschbare und knitterarme Stoffe sparen vielbeschäftigten Eltern Zeit und Mühe. Dunkle oder mittlere Farbtöne bieten in der Regel einen besseren Lichtschutz als helle, helle Farben. Erwägen Sie außerdem Vorhänge mit Wärmedämmung, die zu einer gleichmäßigen Raumtemperatur und einem erholsameren Schlaf beitragen.
Überprüfen Sie Ihre Stoff- und Stilauswahl, indem Sie Stoffmuster an die Wände des Kinderzimmers halten, die Lichtundurchlässigkeit prüfen und beurteilen, wie sie mit der bestehenden Einrichtung harmonieren. Ihr Ziel ist es, Verdunkelungsvorhänge zu finden, die nicht nur perfekt funktionieren, sondern auch einen ruhigen, komfortablen Raum schaffen, in dem Ihr Baby friedlich schlafen kann.
Schritt 3: Messen Sie Ihre Fenster genau aus
Genaue Fenstermaße sind die Grundlage für die Auswahl perfekter Verdunkelungsvorhänge fürs Kinderzimmer. Schon ein kleiner Messfehler kann die Verdunkelungswirkung und die gesamte Raumästhetik beeinträchtigen. Legen Sie sich zunächst die wichtigsten Utensilien bereit: ein Metallmaßband, einen Bleistift und einen Notizblock, um Ihre Ergebnisse präzise zu dokumentieren.
Breitenmessungen erfordern höchste Präzision . Messen Sie den Fensterrahmen an drei verschiedenen Punkten – oben, in der Mitte und unten – von Innenkante zu Innenkante. Diese Maße können aufgrund älterer Bauweisen oder möglicher Unebenheiten der Wände leicht variieren. Notieren Sie sich das kleinste Maß, damit die Vorhänge bequem sitzen und der Stoff nicht gespannt oder gedehnt wird. Beim Kauf von Vorhängen sollten Sie zur gemessenen Breite 10–15 cm hinzurechnen, um eine optimale Verdunkelung und einen schönen Fall des Stoffes zu gewährleisten.
Auch die Höhenmessung erfordert Präzision. Überlegen Sie, ob Sie bodenlange Vorhänge oder eine schmalere Variante bevorzugen, die knapp unter der Fensterbank endet. Für eine optimale Verdunkelung empfehlen Experten, die Vorhänge einige Zentimeter über den Fensterrahmen hinaus zu verlängern . Messen Sie vom Standort der Gardinenstange bis zum gewünschten Endpunkt und berücksichtigen Sie dabei die Stangenhöhe und die Bodenfreiheit.
Berücksichtigen Sie die Montageart Ihrer Gardinenstange als wichtigen Bestandteil Ihrer Messvorgänge. Bei der Montage im Fensterrahmen sind exakte Maße erforderlich, während die Außenmontage mehr Flexibilität bietet. Die Position der Stange hat einen wesentlichen Einfluss auf die Lichtundurchlässigkeit . Wenn Gardinenstangen 7,5–10 cm über dem Fensterrahmen angebracht werden und an jeder Seite 5–7,5 cm überstehen, entsteht ein lichtundurchlässiger Bereich, der unerwünschte Beleuchtung minimiert.
Besondere Fensterformen wie Erkerfenster, Bogenfenster oder unregelmäßig geformte Öffnungen erfordern zusätzliche Messtechniken. Erstellen Sie in diesen Fällen eine detaillierte Skizze Ihres Fensters, in der Sie genaue Maße und alle architektonischen Besonderheiten festhalten. Diese visuelle Vorlage ist eine unschätzbare Hilfe bei der Beratung durch Gardinenspezialisten oder beim Online-Kauf von Gardinen.
Überprüfen Sie Ihre Maße, indem Sie jede Zahl doppelt kontrollieren und mit Ihren Notizen vergleichen. Systematisches Vorgehen beugt teuren Fehlern vor und stellt sicher, dass Ihre Verdunkelungsvorhänge fürs Kinderzimmer genau wie gewünscht funktionieren. Denken Sie daran: Genaue Maße sind die Grundlage für eine perfekt dunkle und ruhige Schlafumgebung für Ihr Baby.
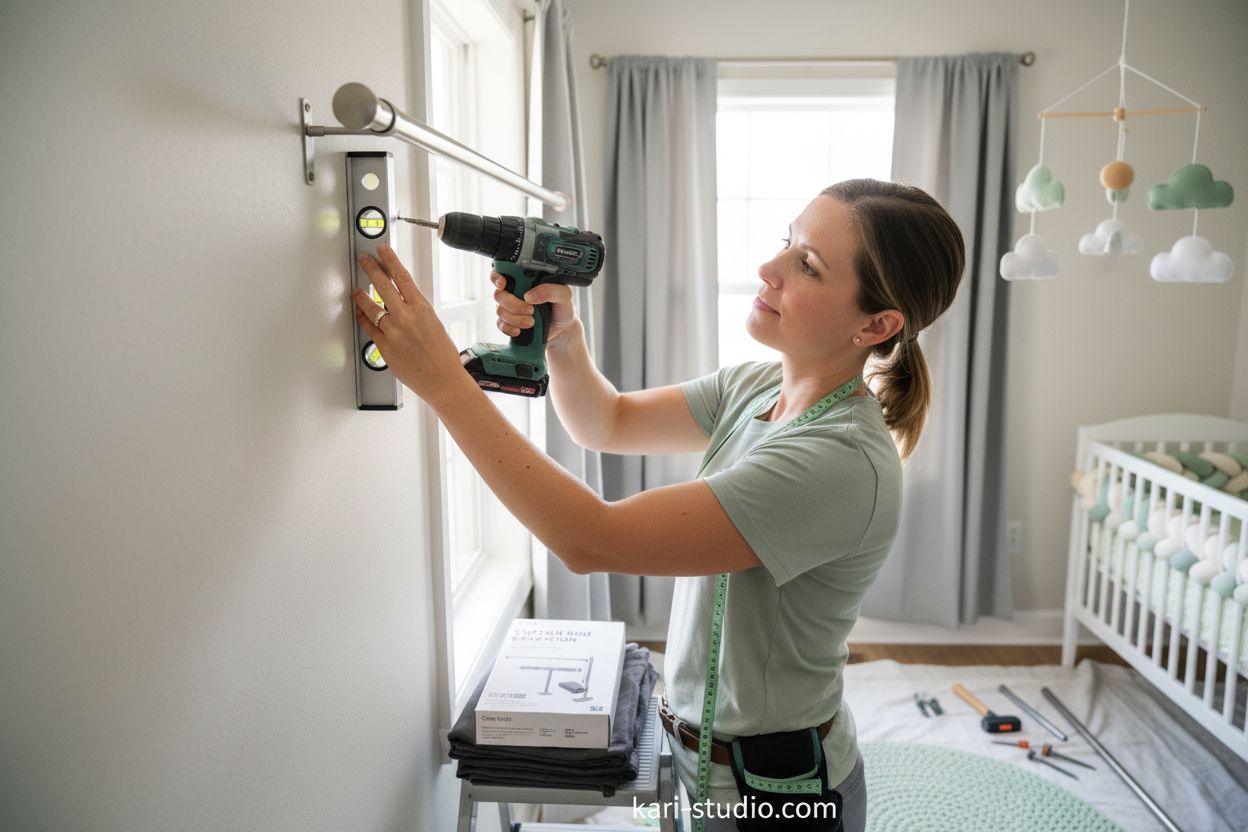
Schritt 4: Wählen Sie die passende Gardinenstange und das richtige Aufhängesystem.
Die Wahl der passenden Gardinenstange und des Aufhängesystems ist entscheidend für maximale Verdunkelung und eine stabile Fensterdekoration im Kinderzimmer. Die richtigen Beschläge entscheiden über die Wirksamkeit Ihrer Verdunkelungsvorhänge und verwandeln eine einfache Fensterabdeckung in ein umfassendes Lichtregulierungssystem.
Bei der Auswahl von Gardinenstangen spielt das Material eine entscheidende Rolle. Entscheiden Sie sich für robuste Metalle wie Aluminium oder Stahl, die stabilen Halt bieten, ohne unnötig aufzutragen. Verstellbare Stangen ermöglichen die Anpassung an verschiedene Fenstergrößen und eine präzise Positionierung, um Lichtspalten zu minimieren. Achten Sie auf den Stangendurchmesser: Aluminiumstangen mit einem Durchmesser von 2,5 bis 3,8 cm bieten optimalen Halt für schwere Verdunkelungsvorhänge, ohne im Kinderzimmer zu steril zu wirken.
Die Montageoptionen bieten vielfältige Möglichkeiten zur Lichtdämpfung. Tageslichtsteuerungssysteme empfehlen umlaufende oder deckenmontierte Stangen, die einen umfassenden Lichtschutz gewährleisten. Deckenmontierte Schienen eliminieren seitliche Spalten vollständig und bieten im Vergleich zu herkömmlichen Wandstangen eine deutlich bessere Lichtabschirmung. Diese Systeme ermöglichen es, dass die Vorhänge bündig an den Wänden anliegen und kein Licht durch die Ränder dringt.
Die Auswahl der Halterungen erfordert sorgfältige Überlegung . Wählen Sie Halterungen mit ausreichendem Wandabstand, damit die Vorhänge nicht die Fensterrahmen berühren. Für Kinderzimmer mit tiefen Fensternischen bieten ausziehbare Halterungen individuell anpassbare Lösungen, die eine optimale Positionierung der Vorhänge gewährleisten. Achten Sie auf Halterungen aus rostbeständigen Materialien, die das Gewicht schwerer Verdunkelungsstoffe tragen können, ohne sich zu verziehen oder zu verbiegen.
Die Tragfähigkeit ist ein weiterer entscheidender Faktor bei der Auswahl von Gardinenstangen und Aufhängesystemen. Verdunkelungsvorhänge sind in der Regel schwerer als herkömmliche Fensterdekorationen und erfordern daher Beschläge, die für hohe Belastungen ausgelegt sind.
 Prüfen Sie die Gewichtsangaben des Herstellers und wählen Sie Systeme, die für mindestens das 1,5-fache des tatsächlichen Vorhanggewichts ausgelegt sind. Diese zusätzliche Tragfähigkeit gewährleistet langfristige Stabilität und beugt potenziellen Sicherheitsrisiken durch unsachgemäße Montage vor.
Überprüfen Sie die Installation Ihrer Gardinenstange und des Aufhängesystems mit einem umfassenden Lichttest. Schließen Sie nach der Montage die Vorhänge vollständig und beobachten Sie den Raum bei hellem Tageslicht. Achten Sie auf Lichteinfall an den Kanten oder durch Lücken im Stoff. Eine erfolgreiche Installation sorgt für nahezu vollständige Dunkelheit und bestätigt, dass Ihre gewählten Beschläge Ihre Verdunkelungsvorhänge optimal unterstützen.
Schritt 5: Vorhänge anbringen und auf Wirksamkeit testen
Die Montage der Vorhänge ist der Höhepunkt Ihrer sorgfältigen Planung und Auswahl. Eine fachgerechte Installation ist entscheidend für die optimale Wirkung Ihrer Verdunkelungsvorhänge und trägt dazu bei, dass Ihr Baby besser schlafen kann. Legen Sie sich zunächst die benötigten Werkzeuge bereit: eine Bohrmaschine, eine Wasserwaage, einen Bleistift, ein Maßband, Dübel und das mit Ihrer Gardinenstange gelieferte Befestigungsmaterial.
Beginnen Sie die Montage, indem Sie die genauen Befestigungspunkte an Wand oder Decke markieren. Verwenden Sie eine Wasserwaage, um eine absolut waagerechte Ausrichtung zu gewährleisten und ein schiefes Hängen der Gardinen zu verhindern. Wählen Sie beim Vorbohren Dübel, die für Ihr Wandmaterial geeignet sind. Gipskartonwände erfordern andere Befestigungstechniken als Putz- oder Holzoberflächen. Setzen Sie die Dübel vorsichtig ein und achten Sie darauf, dass sie bündig mit der Wandoberfläche abschließen, um die Gardinenstange optimal zu tragen.
Die Montage der Stange erfordert äußerste Sorgfalt und Genauigkeit.
Befestigen Sie die Halterungen sicher und achten Sie darauf, dass das Gewicht gleichmäßig auf alle Befestigungspunkte verteilt ist. Schieben Sie die Vorhänge vor der endgültigen Montage auf die Stange, um die Bewegung des Stoffes und mögliche Hänger zu prüfen. Ein reibungsloses Gleiten der Vorhänge ist ein Zeichen für eine korrekte Montage . Stellen Sie sicher, dass die Stange an jeder Seite des Fensterrahmens 7,5–10 cm übersteht, um eine vollständige Verdunkelung zu gewährleisten.
Richtlinien für sicheren Babyschlaf empfehlen, die Einrichtung von Kinderzimmern gründlich zu prüfen, um potenzielle Gefahrenquellen auszuschließen. Führen Sie einen umfassenden Lichtschutztest durch, indem Sie die Vorhänge während der hellsten Stunden des Tages schließen. Verwenden Sie ein Luxmeter oder beobachten Sie den Raum einfach auf Lichteinfall durch Stoffkanten oder zwischen den Vorhangbahnen. Kleine Anpassungen der Stangenposition oder der Vorhangüberlappung können diese problematischen Lichtspalten beseitigen.
Führen Sie nach der Installation einen praktischen Wirksamkeitstest durch, indem Sie die Schlafmuster Ihres Säuglings beobachten. Achten Sie auf Veränderungen der Schlafdauer, des Einschlafens und der allgemeinen Schlafqualität. Notieren Sie sich Verbesserungen beim Mittagsschlaf oder der Regelmäßigkeit des Nachtschlafs. Manche Babys benötigen möglicherweise eine kurze Eingewöhnungszeit an die neue, dunklere Schlafumgebung.
Überprüfen Sie den Erfolg Ihrer Verdunkelungsvorhänge anhand mehrerer Kriterien: vollständige Lichtundurchlässigkeit, stabile Stangenbefestigung, leichtgängige Bewegung des Vorhangs und positive Auswirkungen auf den Schlafrhythmus Ihres Babys. Eine fachgerecht installierte Verdunkelungsvorhanganlage verwandelt Ihr Kinderzimmer in eine ruhige und erholsame Schlafumgebung, die die wichtigen Ruhe- und Entwicklungsbedürfnisse Ihres Babys unterstützt.
Nachfolgend finden Sie eine Tabelle mit einer Übersicht der wichtigsten Werkzeuge und Materialien, die zum Messen, Anbringen und Installieren von Verdunkelungsvorhängen für Kinderzimmer benötigt werden, sowie deren spezifischen Verwendungszweck.
| Werkzeug/Material | Zweck |
|---|---|
| Metallmaßband | Genaue Fenstermessung |
| Bleistift und Notizblock | Messungen aufzeichnen und Montagepunkte markieren |
| Ebene | Sicherstellen, dass Stangen und Halterungen absolut waagerecht sind. |
| Bohrmaschine | Vorbohren von Löchern für die Montagevorrichtung |
| Wandanker | Befestigung der Halterungen an Wandoberflächen |
| Gardinenstange | Verdunkelungsvorhänge |
| Klammern | Hält die Stange an ihrem Platz und sorgt für einen Vorsprung |
| Verdunkelungsvorhänge | Licht abschirmen und das Kinderzimmer isolieren |
Schaffen Sie sich mit Kari Studio Solutions Ihre perfekte Schlafoase.
Sie haben bereits sorgfältige Vorkehrungen getroffen, um Ihrem Baby die bestmögliche Schlafumgebung zu bieten, indem Sie Verdunkelungsvorhänge fürs Kinderzimmer gewählt und Herausforderungen wie unerwünschtes Licht und Temperaturschwankungen angegangen sind. Wahre Sicherheit erlangen Sie jedoch erst, wenn Sie das Kinderzimmer mit Produkten ausstatten, die sowohl optimalen Schlaf als auch höchste Sicherheit gewährleisten.
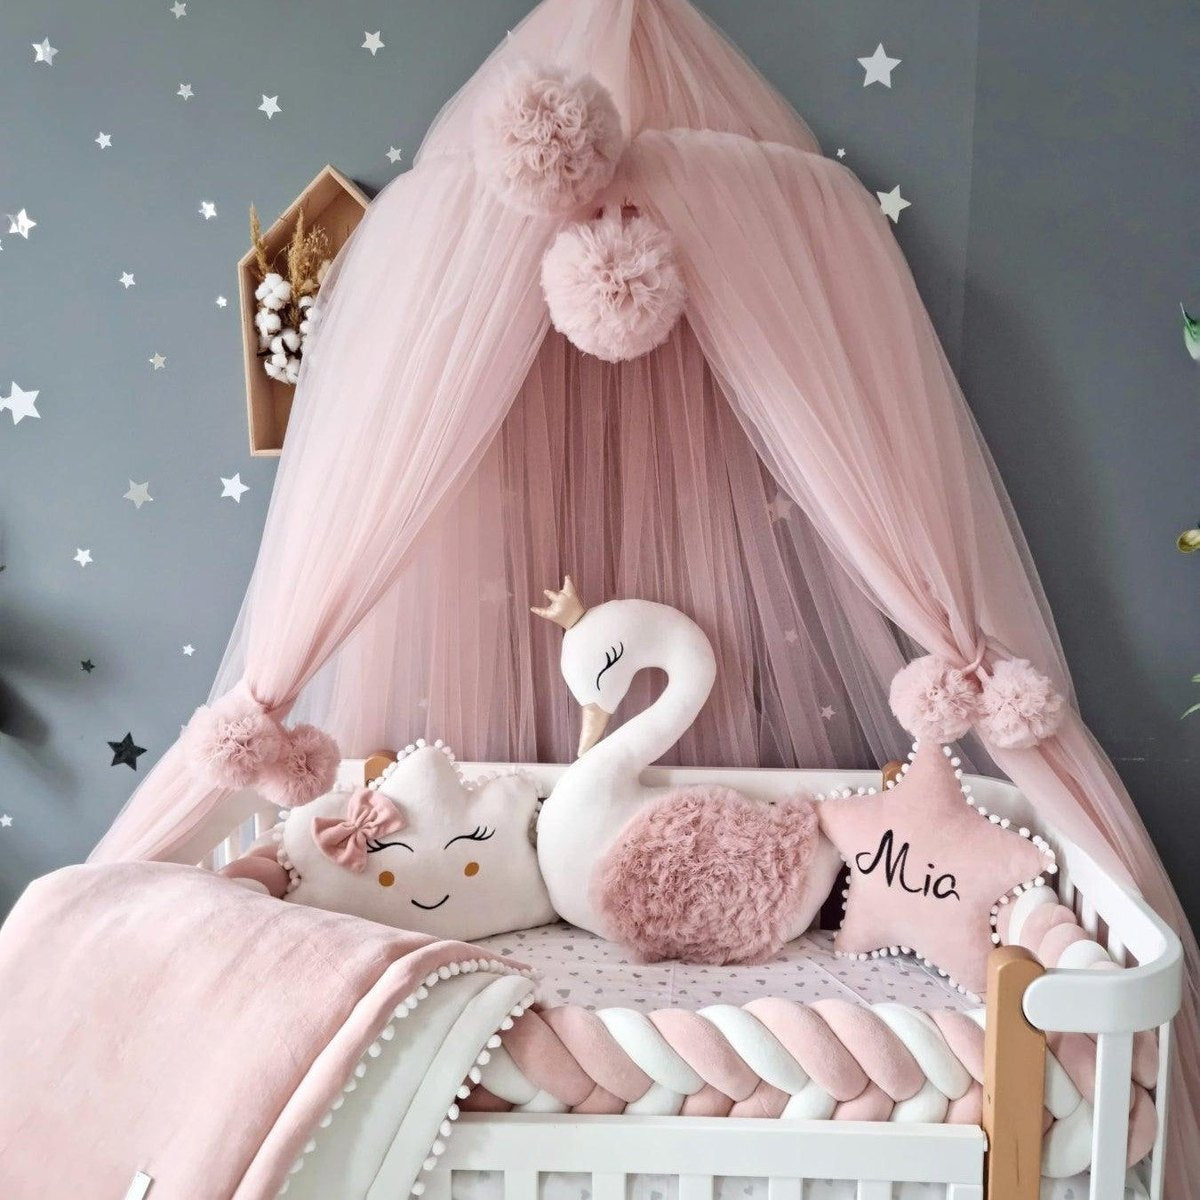
Entdecken Sie unsere handgefertigten Zelte und Babybetthimmel für optimalen Lichtschutz und extra Gemütlichkeit im Kinderzimmer. In Kombination mit hochwertigen Verdunkelungsvorhängen verhindern diese Himmel selbst hartnäckige Lichtlecks und sorgen so für die nötige Dunkelheit für einen längeren, erholsameren Schlaf.
Vervollständigen Sie die Umgestaltung des Babyzimmers mit geflochtenen Nestchen für zusätzlichen Schutz und Geborgenheit im Schlafbereich Ihres Babys. Entdecken Sie noch heute Kari Studio und schaffen Sie eine beruhigende, sichere und komfortable Umgebung für Ihr Baby. Schenken Sie Ihrem Kind die erholsame Nachtruhe, die es verdient, und wählen Sie jetzt das Beste für sein Babyzimmer.
Häufig gestellte Fragen
Wie kann ich die Lichtverhältnisse in meinem Kinderzimmer beurteilen, bevor ich Verdunkelungsvorhänge kaufe?
Überprüfen Sie die Lichtverhältnisse im Kinderzimmer, indem Sie die Fensterausrichtung betrachten und den natürlichen Lichteinfall im Tagesverlauf beobachten. Gehen Sie zu verschiedenen Tageszeiten durch den Raum, um zu sehen, wie das Sonnenlicht einfällt, und achten Sie auf zusätzliche Lichtquellen, die den Schlaf beeinträchtigen könnten, wie z. B. Nachtlichter oder elektronische Geräte.
Welche Stoffarten eignen sich am besten für Verdunkelungsvorhänge im Kinderzimmer?
Für optimale Lichtundurchlässigkeit wählen Sie schwere Stoffe wie dickes Polyester oder Samt. Achten Sie auf mehrlagige Vorhänge oder solche mit integriertem Verdunkelungsfutter, um maximale Dunkelheit und Komfort für Ihr Baby zu gewährleisten.
Wie kann ich sicherstellen, dass ich meine Fenster für Verdunkelungsvorhänge richtig ausmesse?
Messen Sie Ihre Fenster an drei Punkten – oben, in der Mitte und unten – von Innenkante zu Innenkante, um eventuelle Abweichungen zu berücksichtigen. Notieren Sie das kleinste Maß und addieren Sie 10–15 cm, um eine effektive Verdunkelung zu gewährleisten und einen schönen Fall der Gardinen zu ermöglichen.
Welche Art von Gardinenstange und Befestigungssystem sollte ich für Verdunkelungsvorhänge verwenden?
Entscheiden Sie sich für stabile Metallstangen mit ausreichender Tragkraft, um auch schwere Verdunkelungsvorhänge sicher zu halten. Ziehen Sie verstellbare oder deckenmontierte Varianten in Betracht, um Lichtspalten zu minimieren, und wählen Sie Halterungen, die weit genug von der Wand abstehen, damit die Vorhänge ungehindert hängen können.
Wie installiere ich Verdunkelungsvorhänge, um ihre Wirksamkeit zu maximieren?
Installieren Sie Verdunkelungsvorhänge fachgerecht, indem Sie die genauen Montagepunkte markieren und mit einer Wasserwaage die horizontale Ausrichtung sicherstellen. Verwenden Sie Dübel für eine sichere Befestigung und führen Sie nach der Installation einen Lichttest durch, um zu prüfen, ob Licht an den Kanten oder in Spalten zwischen den Paneelen eindringt.
Welche Anzeichen deuten darauf hin, dass meine Verdunkelungsvorhänge den Schlaf fördern?
Achten Sie auf vollständige Lichtundurchlässigkeit und beobachten Sie Verbesserungen im Schlafverhalten Ihres Babys, wie z. B. längere Nickerchen und ein leichteres Einschlafen. Eine fachgerechte Installation schafft eine konstant dunkle Umgebung, die Ihrem Baby einen ruhigen Schlaf ermöglicht.